The per diem rate can be configured only by the admin. Here’s how you can do it:
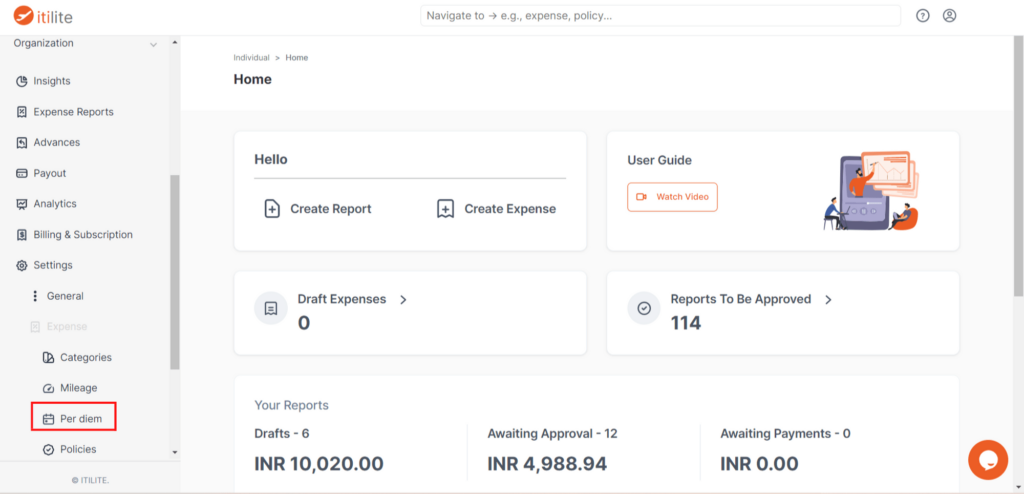
Step 1) From the side menu in the Expense section, go to Organization > Settings > Expense > Per Diem.
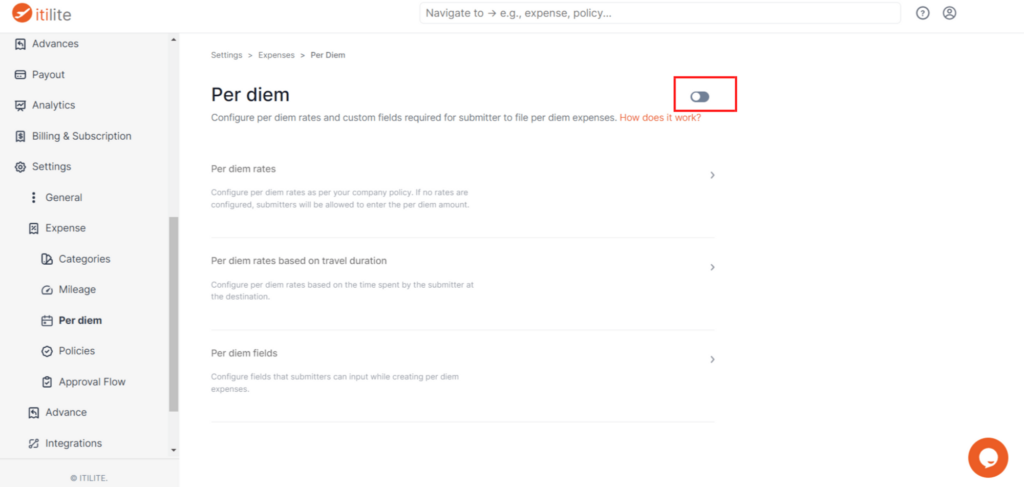
Step 2) By default, per diem is disabled for all new customers. You can enable it by clicking on the toggle in the top right corner.
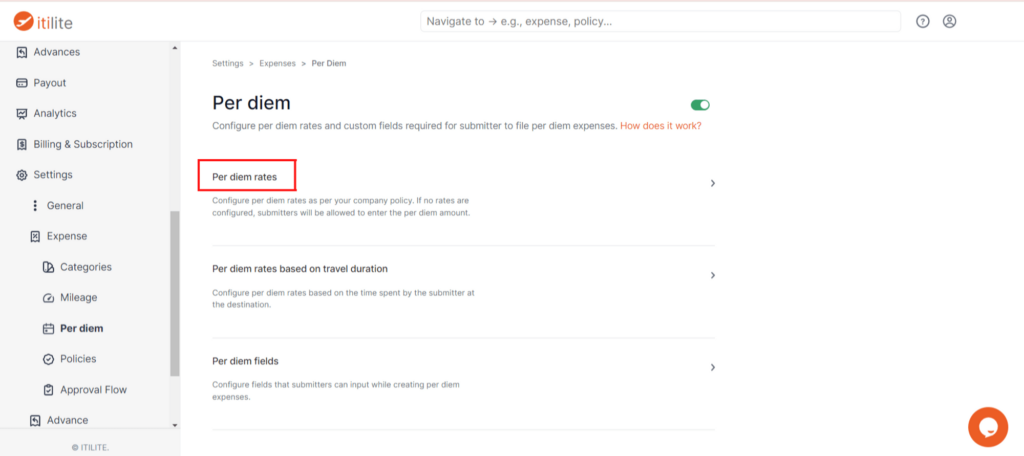
Once the Per Diem feature is enabled, click on the “Per diem rates” section.
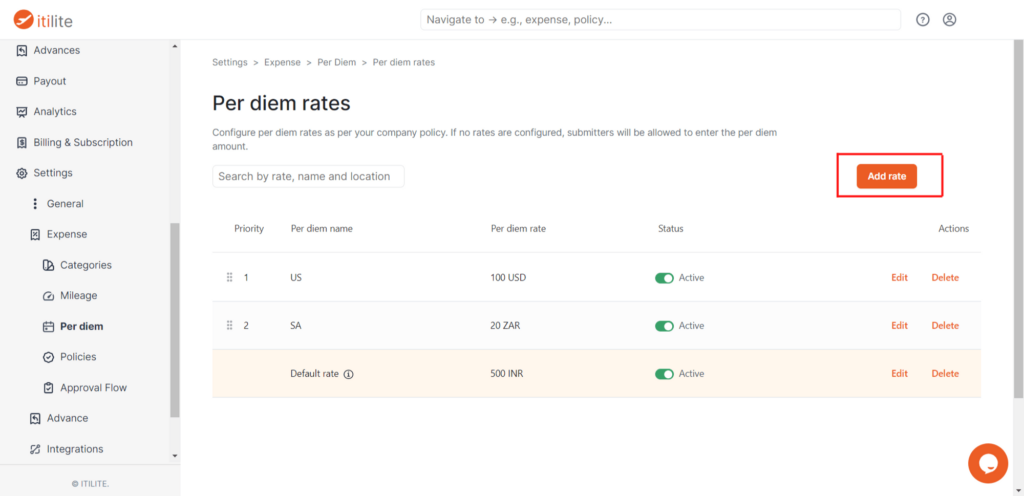
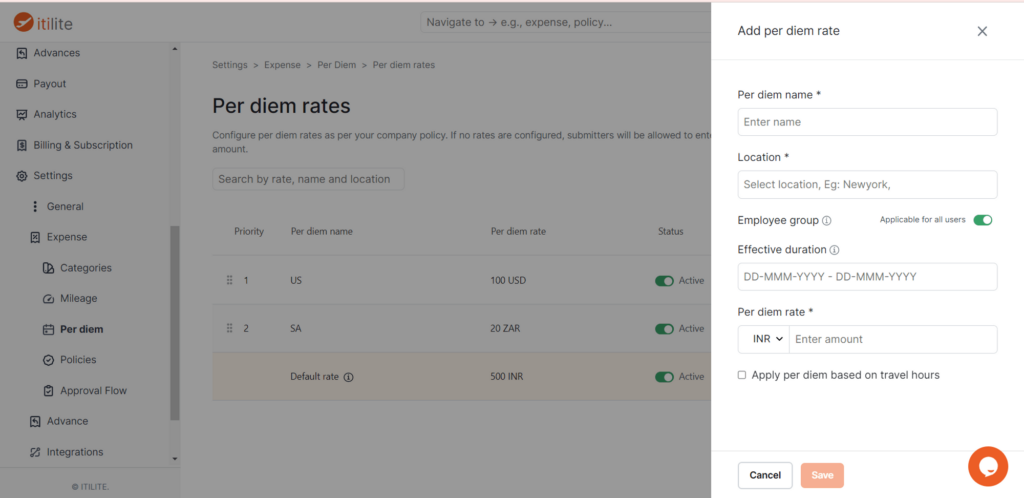
Step 3) Click on “Add Rate” to open up the configuration menu.
Step 4) Enter the following information:
- Per Diem Name: A unique name for the rate you are configuring. It is only visible to the admin; users can’t see the per diem name.
- Location: The locations on which this rate will be applicable. ITILITE allows you to add multiple locations (cities and countries) under one rate.
- Employee Group: By default, per diem rates are applicable for all employee groups. However, if you want the rate to be applicable to a specific group, click on the toggle to disable the “Applicable for all users” functionality. Afterward, you can configure the rate as per “business unit,” “department,” “entity,” and ”level.”
- Effective duration: You can enter the period for which this rate will be applicable.
- Per diem rate: Enter the applicable per diem rate here. By default rate is set up as per the company’s home currency. However, if you want to change it, click on the currency drop-down and choose the relevant currency.
- Per diem rate based on travel duration: If you want to ****configure different percentages of the per diem rate according to the number of hours an employee spends at the destination, you can check the small box beside the “Apply per diem based on travel hours” option.
Step 5) Create the per diem rate by clicking on “Save.”


