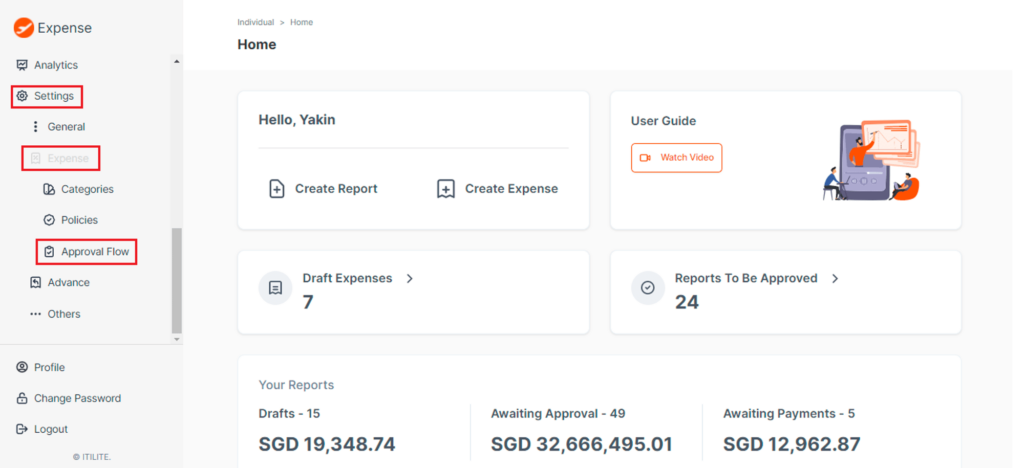
- Go to Settings -> Expense -> approval flow

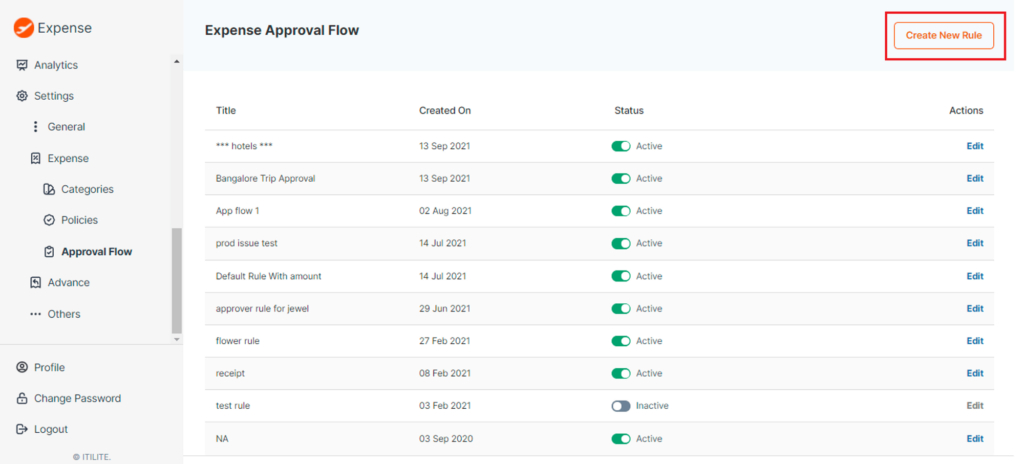
- To create a new approval rule, click on “Create New Rule” and Enter rule title

- Rule Title: This is a free text box, enter the approval rule name of your choice here
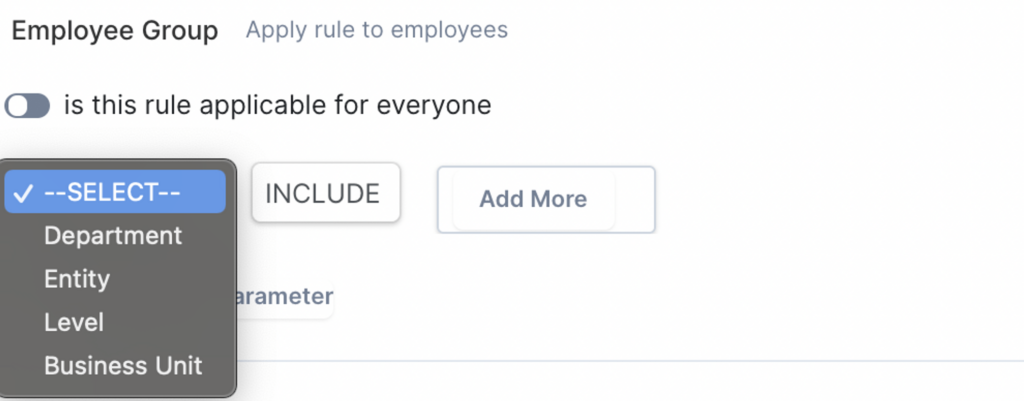
- Define policy levelRules can be created at different levels:I. Across all employeesII. Limited to specific Business Units, Entities or DepartmentsI. Across all Employee: The Employee Group toggle is turned on by default, indicating that the rules are applicable to all employeesII. Limited to specific Business Units, Entities or Departments:i. Employee Group: Turn off toggle so the rule is no longer applicable to all employees (no action needed, move to Step 3).

- Add Employee Parameter*: Select the Department/Entity/Business Unit for which the rule applies, and click on ‘Add More’ to specify the specific unit/entity within the department.Example: If the policy is meant for only the Sales department, select Department, and Sales (under Add More).
- * Note: Employee parameters are displayed only once the users are mapped to each department during user create.

- Rule Type: Refers to pre-defined configurations available within the platform
- Default:
- If selected,this rule will be applicable for all expense reports.
- Outside Policy:
- This rule applies only when an “Outside policy” expense is submitted by the user. (Want to know how to configure “Outside policy” rule?
- Click here
- Total Report:
- This rule is applicable to the total value of the report.
- Example: You can add additional approvals if the report submitted by the user is above X dollars
- Set Amount based rule (Optional): Specify the minimum and the maximum amount for which an approval flow is triggered. Example: If an approval is required for all expense reports exceeding 1,000 USD, select Min Amount: 1,000 and Max Amount: 999999 (default value)
- Approval sequence: Select the approver to whom this report will be sent for approval if the above checkpoints are met.
Prerequisite: To be able to select approvers here, you will need to first add approvers against users on the “user” section (want to know how to add approvers?
Click on ‘Create Rule’ and then you will be redirected to approval flow page.
Here, you can choose to assign the priority to the rule. Rule on Priority 1 will be validated first and approve flow will follow in the assigned priority order
Example: If all Jack’s expenses need to be approved by Adam (Reporting Manager), and Lisa (Finance Manager) if exceeding 1,000 USD:
Ensure Adam and Lisa are mapped as approvers 1 and 2 in Jack’s User Profile
Setup rule for Adam’s Approval: Select Approver sequence -1, and priority -1
Setup rule for Lisa’s Approval; Select Min Amount: 1000, Max Amount: 999999, Approver Sequence -2, and priority- 2


